Solid Spun Aluminum 8.5 footer - Maybe Regency

Status
Please reply by conversation.
Looks good, certainly a big improvement over what you started with!
The last dish I painted was a 10' mesh. I used spray cans and ran out just shy of finishing 2 panels..........they stayed the original aluminum color........sad, truly sad..........that'd never happen nowadays!!!!
 
I like your work! I only wish I checked in here a week ago when you started working on it, maybe i could have suggested using an airless sprayer rented from home depot? did you have a gravity fed can on top? so it depended on air pressure available and heavy sloshing can? maybe im way off? latex paint actually isn't a bad idea. It settles out nice and even, like painted wood on the out side of your house maybe? if you see a pic of my green dish, you see, even though it was painted 15 years ago, its an even finish (well the layer of paint itself, it has become splotchy over the years to water stains, and mildew, back is starting to powder a little). its not peeling and is only scratched looking because of shipping. have you mounted the dish yet? you may be able to rent the machine for $35 for half a day, and cleanup is with water run thru the line. paint can be under $30 and a little goes a long way, sorta. (maybe not like enamel) Penetrol added to any oil base enamel would solve most typical oil base problems; would behave like latex and would slow dry times and even finish by a lot. I thought paint thinner was for oil based enamel and laquer thinner for laquers like furniture laquers or black and white laquers. (read something about laquer thinner to thin paint, sorry don't know where?) if you want to transition to latex from here, since you have it smooth now and no peeling chips of paint, you just need to prime it one coat of kilz 2 which is also water cleanup. machine comes with 50 foot hose, maybe enough to reach to roof for a project of a later date, all only if that finish doesn't smooth to your liking. otherwise i say good job!
 
Last edited:
He Inno,

I have had projects like that in the past where I just had a little bit to go and never got back to it. That's why I try to finish the job completely nowadays so that won't happen again.

Thanks Somery for the recommendations!

I was tempted at one point to try a latex paint I saw at Lowes. It was an acrylic latex primer for aluminum, but I decided against it. Maybe should have gone that route, but it is water under the bridge at this point. I am just going to live with it at this point. Like George said above, after a few months in the weather, it will probably all look the same.

Fred
 
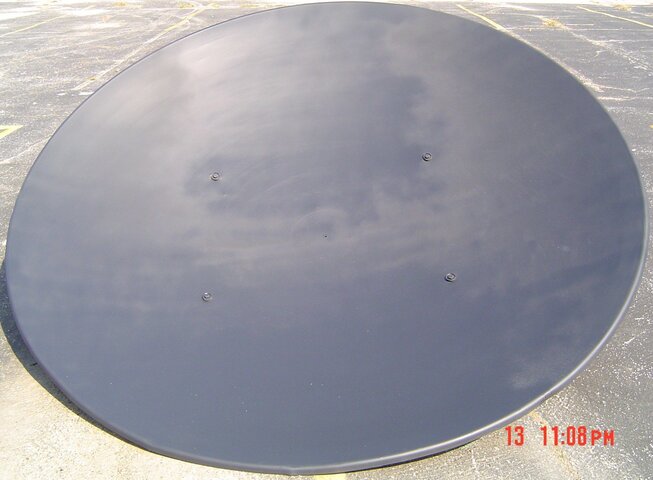
Finally a decent picture that you can actually see.

I cleaned the lens, and then looked back through the camera manual and found the procedure for taking a decent picture of a very dark object and light object. I had to take several shots, and this one is the best.

decent-front.jpg

This is more of what I actually see.

Fred
 
hey

Hi, just wondering if you remember my solid dish shown in the thread called 'bid dish's ' or something like that started by chefwan. Does that outside lip look closer to yours? The curve of it? I think I may be wrong, but ithink mine is a m/a comm dish with a custom frame/mount. Its actual measurment is 8 foot 9 inches. Straight across and not drooping in shape of dish. Anyone know nmore about mine that'd be cool. I'm on my sidekick, so I can't do a whole lot in this post like make links....
 
very nice

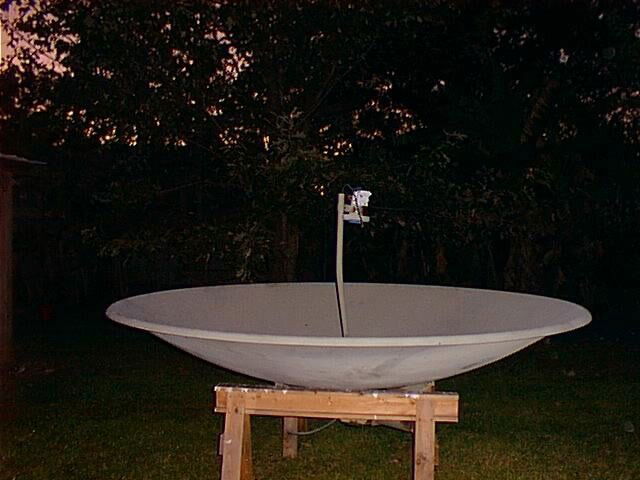
Finally a decent picture that you can actually see.
. . .
This is more of what I actually see.
Hey, all kidding aside, this is pretty good.
Still hard to tell on my laptop LCD what shade of gray it is, without a black and a while reference, but wow!

I'll be right over with my super-white dish and you can tone it down! :up


Also did a close up tour of your dish rim.
Looks to be in pretty good shape.
 
Hey Somery,

I found the post and pics of the dish you are referring to here

It looks like yours is a different dish altogether, but the curve of the rim is similar.

Hey Anole,

I think the shade of the paint in this picture is a little lighter than what it really is because I had to lighten up the exposure to even see the detail.

The dish seems to be in pretty good shape, and it passes the string test in several different places. I made sure of that before I started all this work. :D

I'll look forward to the pics of your super white dish after you have toned it down. :)

Fred
 
Hey Chefwan,

That's the same dish in the link I posted above. I believe Somery said his measured 8'-9" diameter while mine measures 8'-7.5" diameter. Plus his mount is totally different, so I don't think they are the same dish.

Fred
 
oh ok, how is the dish coming along your working on? have you mounted it on the roof yet? what are you going to use this dish for?:)


Hey Chefwan,

That's the same dish in the link I posted above. I believe Somery said his measured 8'-9" diameter while mine measures 8'-7.5" diameter. Plus his mount is totally different, so I don't think they are the same dish.

Fred
 
The dish is coming along nicely. It won't be on the roof for another week or two.

I am going to switch my 4DTV receiver to this dish and leave the existing dish for my Legacy Analog receiver for dish movement and computer tuner for recording. Perhaps later, hook the computer to a VBox II.

Fred
 
So I started to put the support arms and feed-horn in place yesterday afternoon. I thought this should be a piece of cake.

I had decided to use the original 2 arms that came with the dish and substitute a third arm from spares I have. I sanded all the rust off (originals were steel) and painted them.

I put the co-rotor into the feed-horn, set the F/D ratio to 0.42, (my calculations call for 0.44, but the co-rotor only goes to .42) and bolted the arms and their brackets on the feed-horn and then to the dish. The original arms end angle that goes to the feed-horn were set so the feed-horn would have been a lot closer to the dish than my calculations call for. I thought about heating them and bending them to adjust, but decided to just substitute all three with spare aluminum ones. I left it at that last night.

This morning I put the three new arms and feed-horn together and placed them on the brackets and tried pushing them in to raise the feed-horn to its proper height. Ended up with distances from the rim to the feed-horn all over the scale. What was happening was the rim of the dish was being pushed out instead of the feed-horn going up.

I didn't realize that the support arms actually help with the stability of the dish rim on this particular dish by holding against each other or something like that. :confused:

So I sat there thinking how am I going to get the feed-horn in place with equal distance from the rim to the feed-horn and at the same time have the perfect Focal Distance.

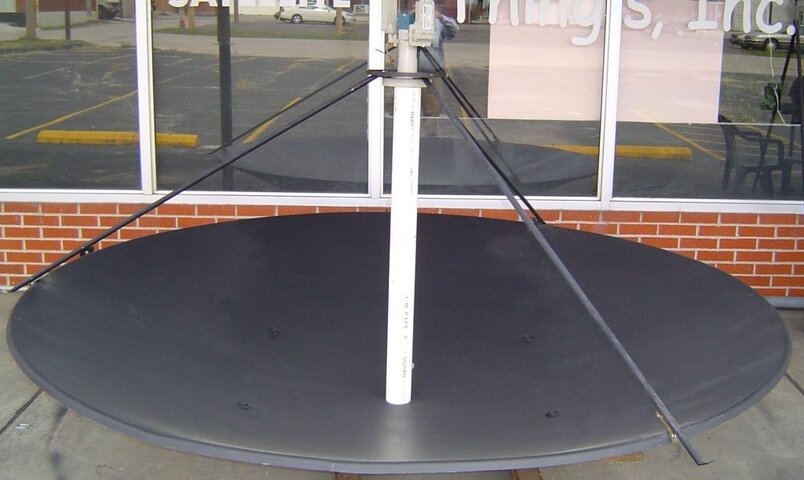
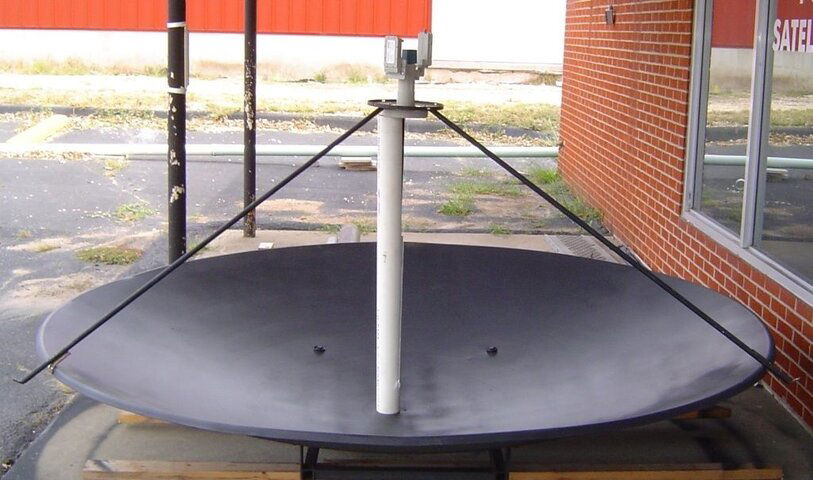
I cut a piece of PVC pipe to exactly 44" which put the 44.2" just about a 1/4" inside the wave-guide. Put the pipe in the center of the dish and lowered the feed-horn and support arms assembly onto it. Adjusted distances for distance from rim to feed-horn, and tightened everything down.

The feed-horn is now in the center of the dish, with a perfect Focal distance, and equal distances from rim to feed-horn.

I know some of you are thinking why not just use the distance that was originally set up. Unfortunately when I picked up the dish, one of the support arms was rusted in two, so I couldn't get the original Focal Distance. The second thing is that it was set up C-Band only when installed. Thirdly, the original installer may or may not have known what he was doing. :D

C-band analog is easy to tune in, and still be a long ways from having the dish tuned.

So here are a couple of pics of the feed-horn and wave-guide with my helper:
feed-helper.jpg feed-helper2.jpg

Hope my calculations are correct. :cool:

Fred
 
Lookin' good. I'll be curious as to what you find with your calculations for focal length. That brought back memories of installing my first C-Band dish some 16 years ago. The dish I was using did come with instructions on calculating focal length, or maybe it was the feedhorn 'cause it was adustable. It was only a 6' dish so it really was critical as to how close things were to being perfect........although that was only C-Band as well.
I'm guessing that the perfect "focal spot" might be different on some dishes as some are deeper than others (I think). Some are probably using a different section of the parabola....or perhaps a different formula for calculating the parabola......something I hazily rememeber from high school math.......a bit more than 16 years ago. Hmmm.......might have to brush up on it as I'll be doing some dish hunting soon and I have theorized that the spun aluminum would be my best choice for C and Ku band although I might end up with 2 BUDs if I can find 'em. The local cable company here has 3 quite large, quite nice dishes and I'm pretty sure all their feeds are now fibre.......might have to talk to somebody there. One is probably a 12 ft Andrew dish.......and probably weighs a ton but would likely have some very nice electronics with it!
 
Hey Inno,

I used this F/D ratio calculator and this link for converting from inches to cms.

I used the same calculator for the Birdview and it was right on the money. I tried it with the 7.5' Perfect 10 and found that the manufacturers specs were a little closer in by about an inch and actually worked better. Unfortunately I don't have the manufacturer's specs for this dish.

I'm hoping that the calculator works good for this dish. I measured the diameter of the dish at 8'-7.5" and the depth using the string test across the dish at 15" and came up with the figures I used. :D

It is adjustable using the slots in the support arms where they connect to the scalar ring and is adjustable at the outer edges if need be though that would be a real pain.

Hope the links help you with yours when you get ready to set up. :)

Fred
 
I finally got the mount for this dish from the welder. He delivered it Sunday afternoon.

I started putting it together on the roof on Monday. Yesterday, I got the scrap yard guy to come down and put the blocks and the dish on the roof, and my two kids and I set it on the mount.

Today I started wiring up the feed-horn, installed a DBS LNB and put my box on the back side of the mast. I also put the actuator in place.

That part is finished. Tomorrow I get to play. I will take an analog receiver and the Traxis to the roof and tune the dish in.

I certainly hope the calculations I used for F/D ratio and Focal length are correct because the wave-guide is pointing perfectly at the center hole and I would rather not disturb it if possible.

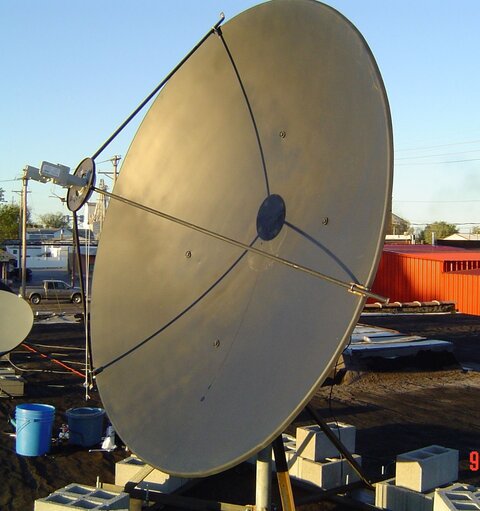
Here are pics from yesterday. Didn't take any pics today. I will take final pics tomorrow.

far-west-solid.jpg

from-ground-solid.jpg

Hopefully will get the wiring into the building in the next day or two. I am looking forward to seeing if it out performs the Birdview. :D

This is the Fifth BUD on my roof. :cool:

Fred
 
Status
Please reply by conversation.

BUD #2 - Successful BUD Hunting

Questions about dsr920 and X4

Users Who Are Viewing This Thread (Total: 0, Members: 0, Guests: 0)

Who Read This Thread (Total Members: 1)