Echostar dish rescued...
- Thread starter Jason S
- Start date
- Latest activity Latest activity:
- Replies 71
- Views 16K
You are using an out of date browser. It may not display this or other websites correctly.
You should upgrade or use an alternative browser.
You should upgrade or use an alternative browser.
- Status
- Please reply by conversation.
Thanks for posting all the photos, i had a 7.5 C-band dish that look worse and that. With some TLC it came back to live.
Thanks for the help! It's all been interesting work so far. I'm looking forward to the final outcome, but the journey has been pretty neat too...
Jason, are you located in an area that freezes in the winter? If so, find the bottom outside rim of the dish. Drill a small drain hole through the lowest point on the backside of that rim. What you are doing, is adding a water drain hole to that piece. Because water tends to collect there during rain storms and later when it freezes, that piece will burst open or bulge out because of the ice buildup.
Jason, are you located in an area that freezes in the winter? If so, find the bottom outside rim of the dish. Drill a small drain hole through the lowest point on the backside of that rim. What you are doing, is adding a water drain hole to that piece. Because water tends to collect there during rain storms and later when it freezes, that piece will burst open or bulge out because of the ice buildup.
Southeast Kansas, so it'll freeze here. Thank you for the reminder. I had a passing thought about that, which you refreshed! I will check to see if there is anything of the sort already and if not I think that a weep hole would surely help. If the hole is absent, I'm thinking 1/16" or 1/8" should work. Any thoughts?
There's not much progress to report this evening...
I had thought I'd have started on the mount work, but I've got a decision on exactly where this setup will go. I will say that I received a compliment on the looks of the project from my wife, so that is a definite plus!
Before I start on finalizing the location, I have to look and double check the proposed areas due to trees on and adjacent to the property. I don't want to have to move this anytime soon. As it is, the location I think I want to use will require me to top a tree. That's not a huge concern, however I think I'll consider the location a bit longer...
So here are some photos of the dish with some fresh paint applied. The patch did indeed "disappear" (hint it's on the right side in the photo). Having everything a uniform color, I'm a little bit happier with the panel straightening job. BTW, please don't pay any attention to the messy yard in the background! I've been preoccupied!
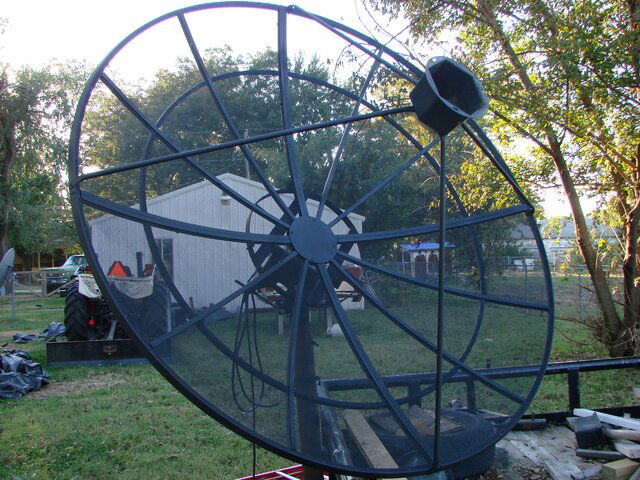
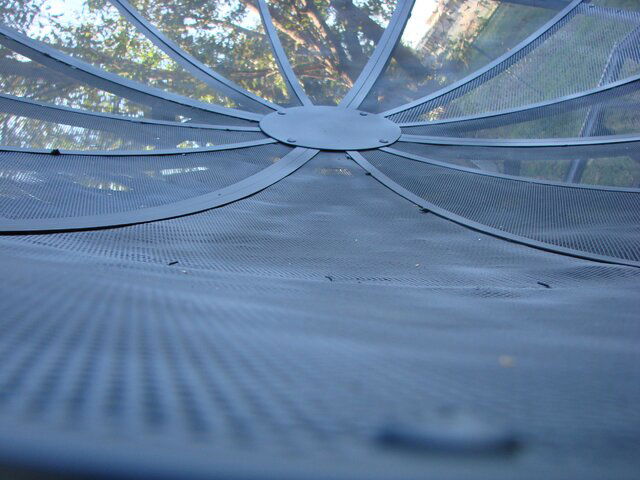
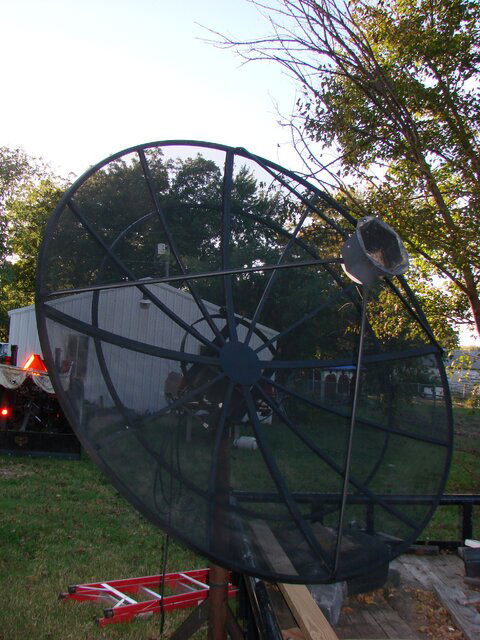


Southeast Kansas, so it'll freeze here. Thank you for the reminder. I had a passing thought about that, which you refreshed! I will check to see if there is anything of the sort already and if not I think that a weep hole would surely help. If the hole is absent, I'm thinking 1/16" or 1/8" should work. Any thoughts?
I'd go with 1/8". You want the water to easily drain out of that rib before freezing weather starts. I've seen many dishes with bulged bottom ribs, so beats me why manufactures didn't think of this themselves.
They'd have to put holes in all the panels because they wouldn't know which panel would wind up being the bottom.So leave it to the installer to find the bottom and drill a hole,which of course they never did.I'd go with 1/8". You want the water to easily drain out of that rib before freezing weather starts. I've seen many dishes with bulged bottom ribs, so beats me why manufactures didn't think of this themselves.

Dishpointer makes a phone app (not free unfortunately) that uses your phone camera to show where in the sky the satellites are. From what I've heard (doesn't work on my Windows phone unfortunately) it's good. It may be of some assistance.I've got a decision on exactly where this setup will go. Before I start on finalizing the location, I have to look and double check the proposed areas due to trees on and adjacent to the property. I don't want to have to move this anytime soon. As it is, the location I think I want to use will require me to top a tree. That's not a huge concern, however I think I'll consider the location a bit longer...
Dishpointer makes a phone app (not free unfortunately) that uses your phone camera to show where in the sky the satellites are. From what I've heard (doesn't work on my Windows phone unfortunately) it's good. It may be of some assistance.
I've seen the app and would love to have that right about now... I'm way behind the times though with my 4 year old Motorola Quantico. Someday, maybe.
What I wound up doing: With the dish at the top of the polar mount arc, I took a measurement of the height of the bottom of the dish to the ground. I then used a 2x4 approximately the same length as what I measured (i.e., about 38") and placed an angle finder along side the 2x4. . I set the board on the ground vertically, and adjusted the angle finder to about 37 degrees. I then knelt down and sighted along the angle finder to check for offending trees.
I figured this would give me some idea of what may be working against me.
For today:
I got tired of messing with declination adjustments and decided to use the hydraulic tractor bucket to fine tune things...
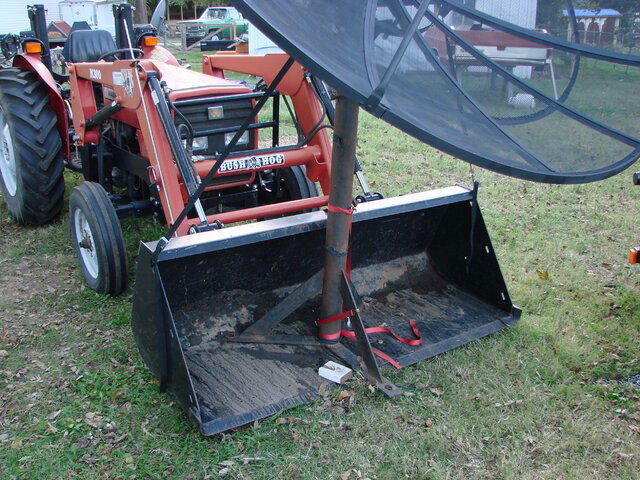
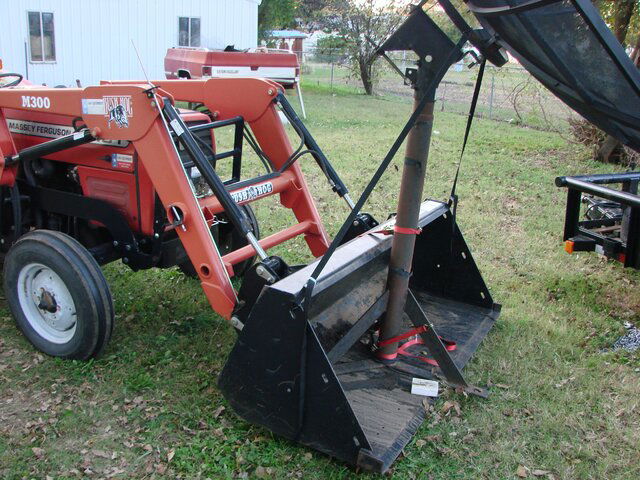
Actually, I needed to move the dish to my proposed location. Since there was no help around and I didn't feel comfortable wrestling the dish and polar mount off the pole; nor did I want to take the dish off the polar mount... I decided (probably unwisely) to strap the whole shootin' match into the tractor bucket.
I didn't have very far to take it. So keeping the bucket low, parking brake on, Lo creeper gear and transmission in 1st... I very slowly moved the dish to it's new location. I put the dish on the ground facing due south and with the pole close to plumb, I stuck the camera on the dish side of the scalar and snapped a photo.
This photo pretty much confirms what I had sighted using the angle finder and 2x4. Again, this is about due south which would be around 96W.
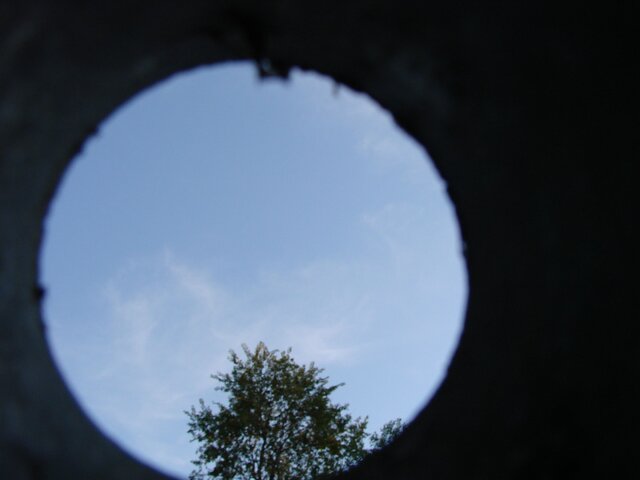
As it is, we're going to have to trim quite a few trees anyways. So I'll have the tree trimmers lop off this offender while they're at it...
Tomorrow, I have planned to install the concrete base and maybe work on the motor, or drill/tap the scalar, or reposition a Ku satellite, or straighten up the shop, etc.
I got tired of messing with declination adjustments and decided to use the hydraulic tractor bucket to fine tune things...


Actually, I needed to move the dish to my proposed location. Since there was no help around and I didn't feel comfortable wrestling the dish and polar mount off the pole; nor did I want to take the dish off the polar mount... I decided (probably unwisely) to strap the whole shootin' match into the tractor bucket.
I didn't have very far to take it. So keeping the bucket low, parking brake on, Lo creeper gear and transmission in 1st... I very slowly moved the dish to it's new location. I put the dish on the ground facing due south and with the pole close to plumb, I stuck the camera on the dish side of the scalar and snapped a photo.
This photo pretty much confirms what I had sighted using the angle finder and 2x4. Again, this is about due south which would be around 96W.

As it is, we're going to have to trim quite a few trees anyways. So I'll have the tree trimmers lop off this offender while they're at it...
Tomorrow, I have planned to install the concrete base and maybe work on the motor, or drill/tap the scalar, or reposition a Ku satellite, or straighten up the shop, etc.
I'd go with 1/8". You want the water to easily drain out of that rib before freezing weather starts. I've seen many dishes with bulged bottom ribs, so beats me why manufactures didn't think of this themselves.
I checked the dish and it has 1/8" holes drilled already. One less step for me.
They'd have to put holes in all the panels because they wouldn't know which panel would wind up being the bottom.So leave it to the installer to find the bottom and drill a hole,which of course they never did.
Apparently the original installer on this dish actually did drill the holes!
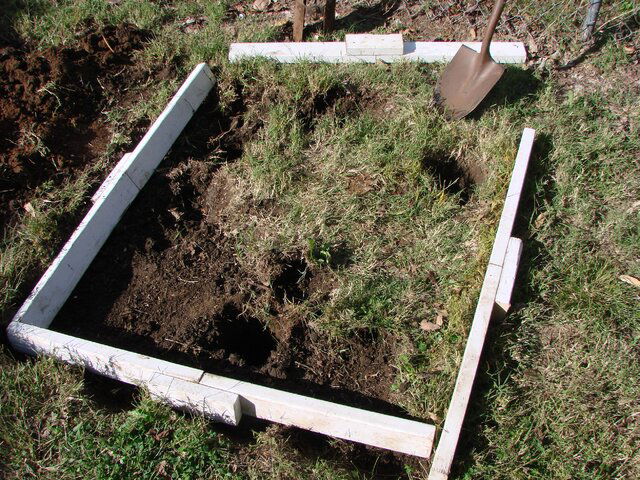
Concrete work is completed and motor is working, clean and oiled. I'll post those photos in another update, but I have some questions...
I've got some scalar issues that I need to address. I would like to use the Titanium C-1 LNBF. This scalar is not going to work for this, in fact the dish side of the scalar will fit into the LNBF.
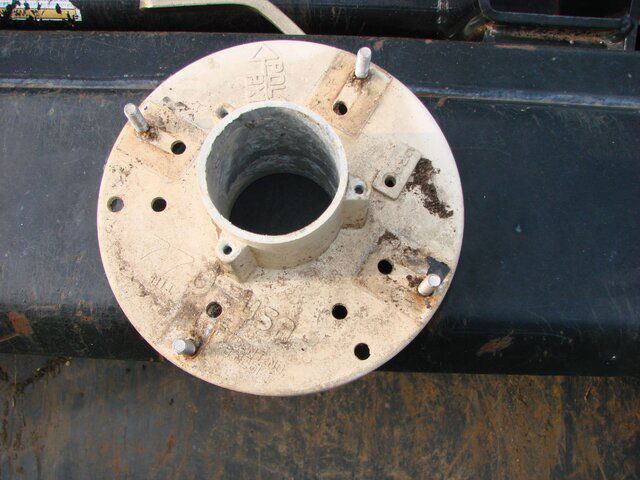
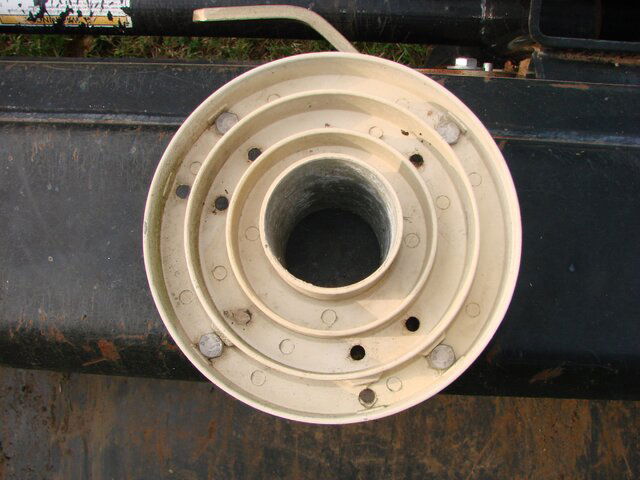
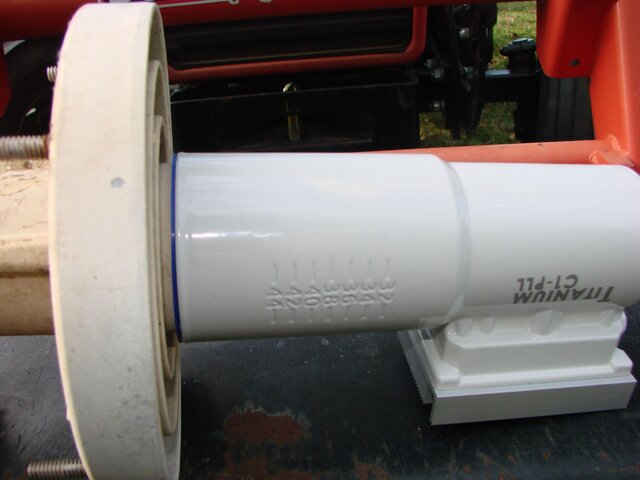
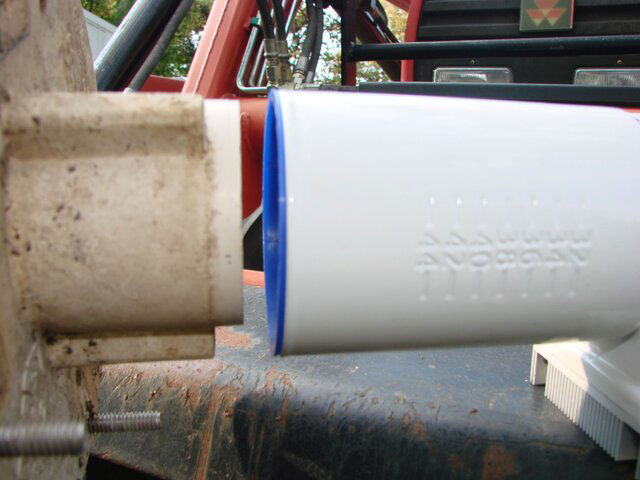
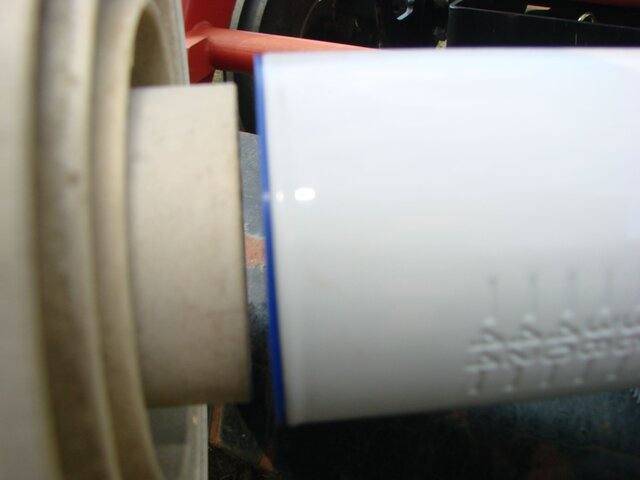
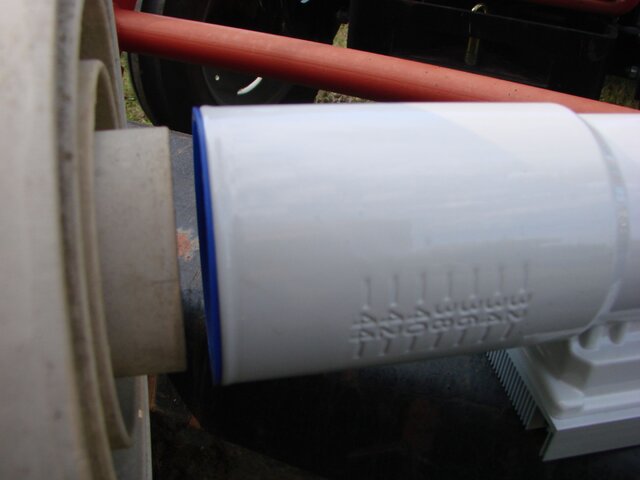
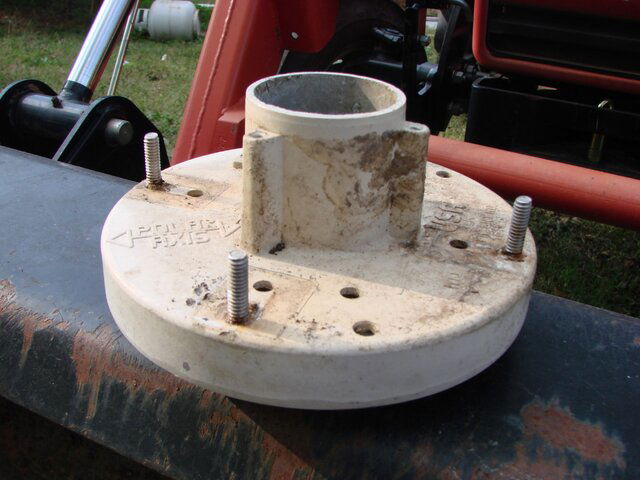
It looks like I need a different scalar, any suggestions?
I've got some scalar issues that I need to address. I would like to use the Titanium C-1 LNBF. This scalar is not going to work for this, in fact the dish side of the scalar will fit into the LNBF.


It looks like I need a different scalar, any suggestions?
Attachments
Use the scalar provided with the Titanium C1PLL. 
I don't understand the construction of the cement pad. No post or anchor bolts?
I don't understand the construction of the cement pad. No post or anchor bolts?
Use the scalar provided with the Titanium C1PLL.
I don't understand the construction of the cement pad. No post or anchor bolts?
Wow... It's right there in the box.. When I ordered the C1, I ordered the mini-bud scalar too. I unboxed the parts I had intended to use for the minibud project... I sheepishly admit, I don't recall the flat scalar. Thank you.
As for the photos, I guess I posted things that I hadn't intended to post yet.
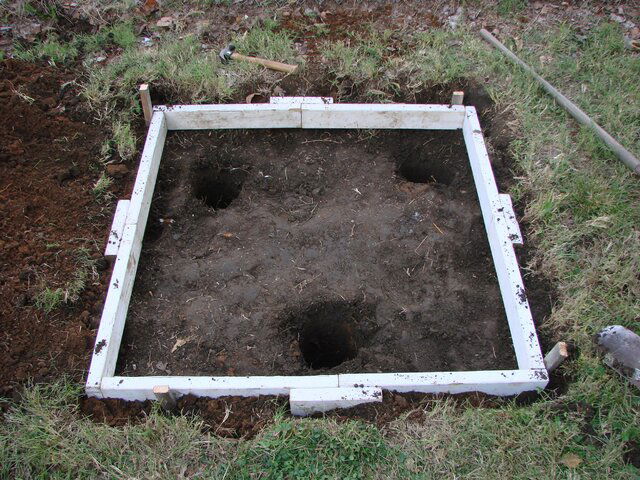
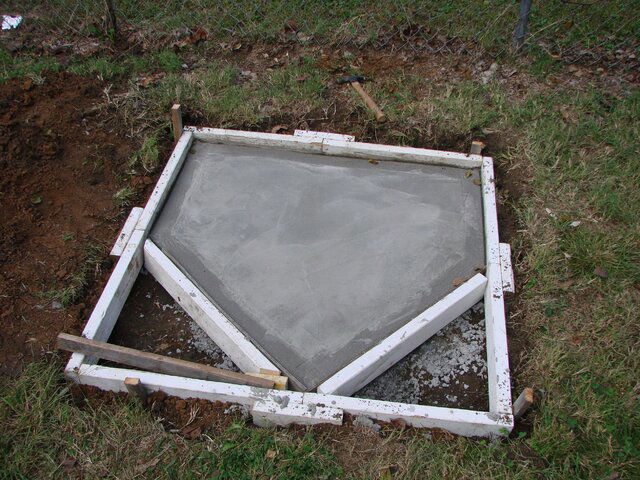
So, the post base is three part. This photo was posted previously.
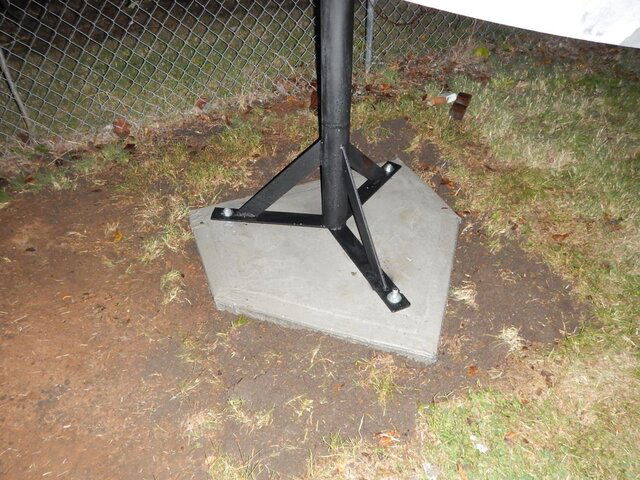
The three holes in previously posted photos (DSC06386) were dug to 36", which is essentially bedrock. The bottom of the holes were belled out. Concrete with rebar was place in each hole and then the overlying pad was placed. The top pad, which is about 4" thick, is rebar reinforced to each hole location. I had originally thought of a square pad, but went with 'home plate'.
Instead of trying to place anchor bolts into the concrete to try and match the existing mount, the bolt holes will be drilled into the concrete and wedge anchor bolts will be installed (with an addition of epoxy to further strengthen the connection). From looking at the existing mount, the holes for the previous location had to be torched out to match the concreted anchor bolts.
I had originally set out to do a 'J' or 'L' bolt system set in concrete. The hardware store in town only 1/2" 'J' bolts. The closest Orange or Blue box store that might have larger J-bolts is a 2-3 hour round trip. So without a whole lot of options on embedded anchor bolts, I decided to do wedge anchor bolts.
Since we're looking at around 7-days to reach about 90% to 95% strength (according to the engineers), I'll place the anchor bolts next weekendish... The problem I'm concerned with, and I had thought about it previously, is that I didn't get my wiring conduit set.
The wiring conduit not being placed through the slab isn't that serious of an issue.
However, drilling anchor holes through the cement slab and mounting wedge-style anchors may be a serious mistake. The base of that tripod isn't large enough to spread the weight around safely. That means that the slab and the anchors have to make up the difference in holding power. Around here, one 40mph wind and the dish would most likely come crashing over, because it would rip right out of the slab with those sorts of anchors. You are dealing with a possible HUGE wind load against a dish that size, on the order of 500 to maybe 1,000 lbs of force depending on wind speed.
However, drilling anchor holes through the cement slab and mounting wedge-style anchors may be a serious mistake. The base of that tripod isn't large enough to spread the weight around safely. That means that the slab and the anchors have to make up the difference in holding power. Around here, one 40mph wind and the dish would most likely come crashing over, because it would rip right out of the slab with those sorts of anchors. You are dealing with a possible HUGE wind load against a dish that size, on the order of 500 to maybe 1,000 lbs of force depending on wind speed.
The wiring conduit not being placed through the slab isn't that serious of an issue.
However, drilling anchor holes through the cement slab and mounting wedge-style anchors may be a serious mistake. The base of that tripod isn't large enough to spread the weight around safely. That means that the slab and the anchors have to make up the difference in holding power. Around here, one 40mph wind and the dish would most likely come crashing over, because it would rip right out of the slab with those sorts of anchors. You are dealing with a possible HUGE wind load against a dish that size, on the order of 500 to maybe 1,000 lbs of force depending on wind speed.
Thank you for the input, Primestar31. I believe I will pass on the wedge anchors.
I discussed the pad/pier design with an engineer (former Army Corps of Engineers) and for extra security against the mounting bolts breaking out, his suggestion was to drill through the pad into each of the three piers and epoxy in threaded rod.
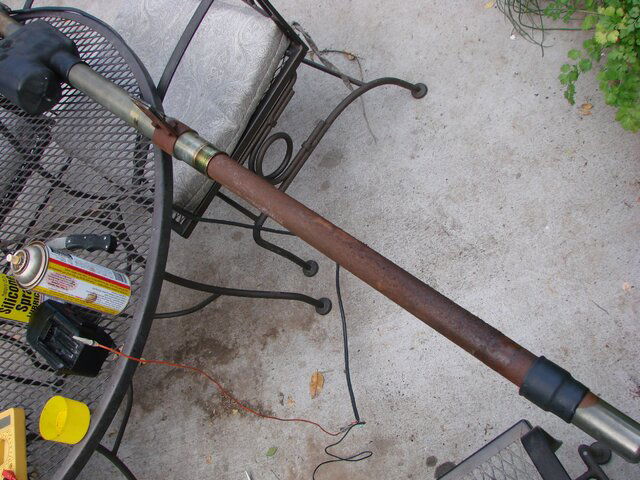
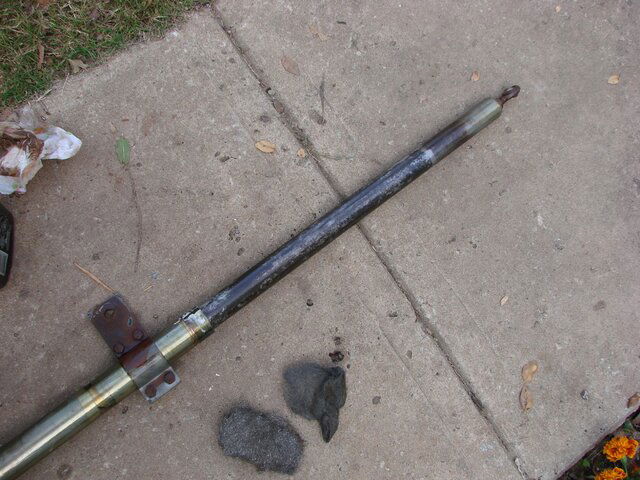
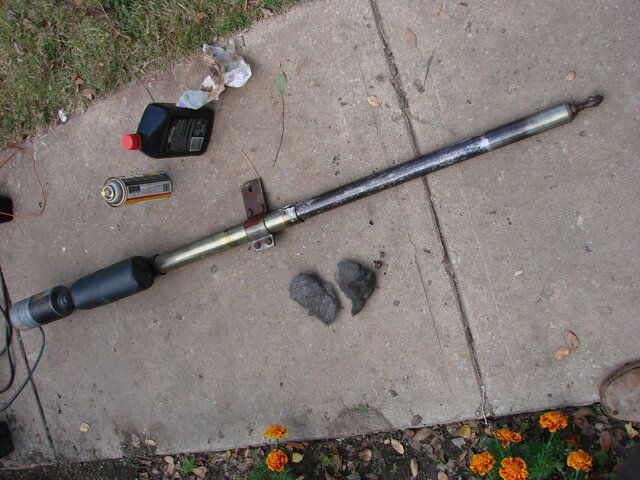
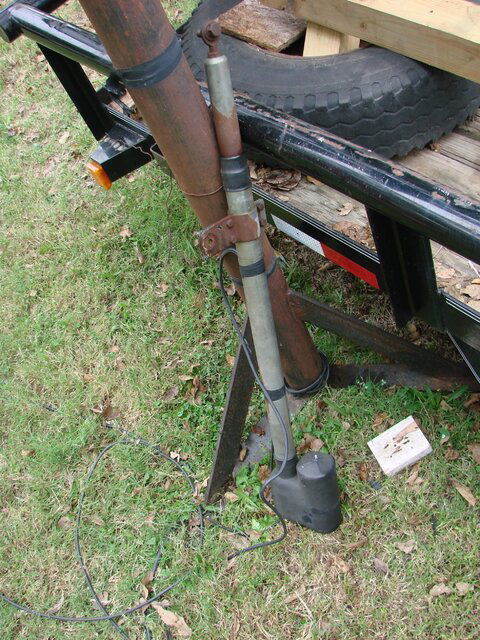
These actuator photos were inadvertently posted earlier, however I'll add some details.
Using an 18V Milwaukee battery pack, I hooked up the motor wires and got the the actuator extended and found that the tubing was pretty corroded.
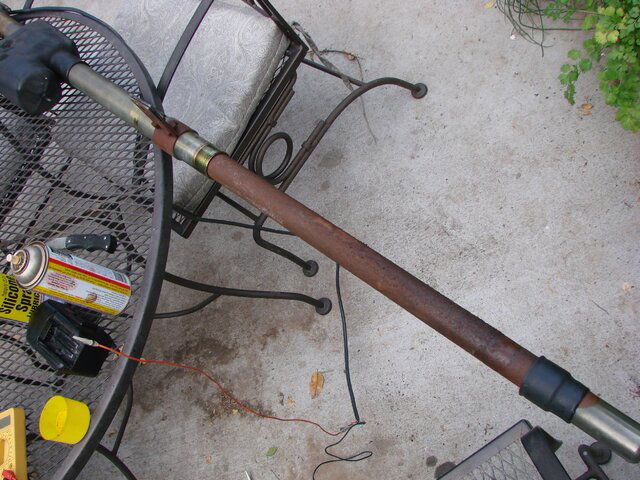
I was able to get the tube cleaned up (at least the outside) using 60 grit sand paper to get the bulk of the rust off the tube, followed up with a rust/paint stripping wheel I chucked into my drill.
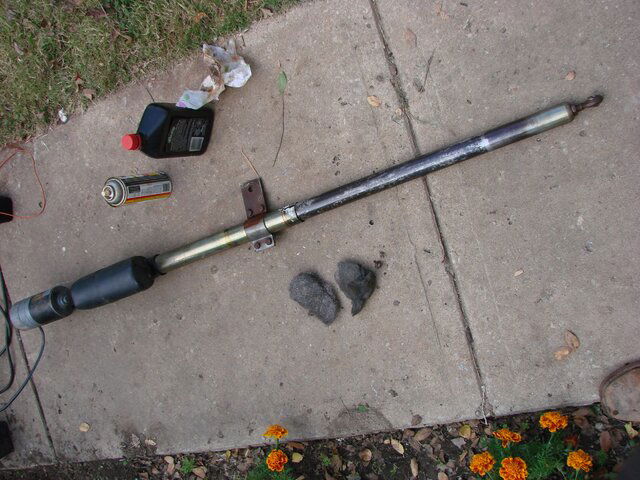
I lubed the tube with spray lithium grease and a little bit of motor oil. The motor and actuator ran very quiet and the limit switch operated correctly.
I haven't taken the motor or actuator down any further. Would there be a reason to fully disassemble it at this time?
Using an 18V Milwaukee battery pack, I hooked up the motor wires and got the the actuator extended and found that the tubing was pretty corroded.

I was able to get the tube cleaned up (at least the outside) using 60 grit sand paper to get the bulk of the rust off the tube, followed up with a rust/paint stripping wheel I chucked into my drill.

I lubed the tube with spray lithium grease and a little bit of motor oil. The motor and actuator ran very quiet and the limit switch operated correctly.
I haven't taken the motor or actuator down any further. Would there be a reason to fully disassemble it at this time?
A little more progress to report.
Yesterday: As the pad was cured sufficiently to drill for epoxied bolts; I drilled three holes into the concrete about 10-inches deep- through the pad into the piers. I cut three pieces of 3/4" grade 5 threaded rod (not all-thread). To secure the rod into the holes, I used USP connectors brand CIA-Gel 7000 concrete epoxy. It comes in a tube like silicon caulk, there is a mixer nozzle that attaches on the end which mixes the resin and hardener. After the holes were thoroughly cleaned and the threaded rod thoroughly cleaned; I injected the concrete epoxy into the hole and then inserted the threaded rod. Recommended bolt up time with the epoxy is supposed to be 4 to 8 hours, this set 24 hours before any stress.
Today, I painted the post and legs and let the paint set for a little bit. I thoroughly coated the anchor bolt threads with anti-seize, installed the lower set of nuts and washers and then set the post onto the anchors, placed washers and snugged the upper nuts. By the weekend, the epoxy should have cured to full strength and the concrete should be very near full working strength. As I didn't take photos of the epoxy job, I will have to say it is a bit more time consuming and messier (e.g., blowing concrete dust out of holes) compared to setting anchor bolts in concrete. However messy it was, I was pleased when my mount set down perfectly on the anchors.
At this point, I thought I'd see if I was anywhere near plumb and to my surprise, it was nearly spot on in both directions. The anchor bolts with a nut and washer above and below the mount will allow adjustment, so I should be able to fine tune plumb pretty quick.
I was in the process of trying to get the dirtwork cleaned up when I ran out of daylight. So I washed off the pad and snapped some photos.
Here is the concrete base with the dish mounted on the anchors:
While the paint was drying, I also test fit the scalar that was included with the Titanium C1PLL LNBF. To accommodate the three LNBF set screws, the arms seem to be mounted further outboard than with the previous scalar.
Here is a photo of the scalar, the silver is smudged anti-seize...
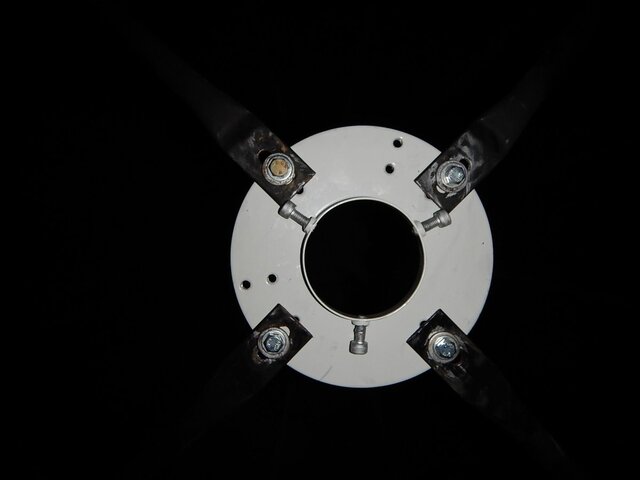
I think the scalar is fairly close to how it needs to be mounted, but would like some input. All legs of the scalar mount are pretty much equal distance around the scalar. Would the new scalar change things, like focal distance (or anything else), enough to worry about? As it is, I don't think the legs will mount any further inboard without interrupting the LNBF set screws.
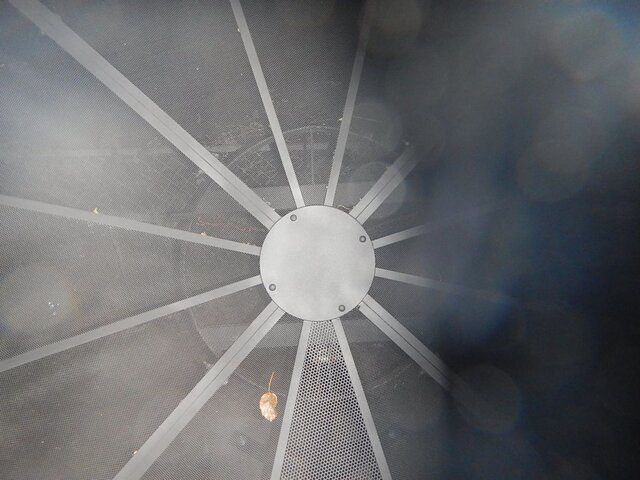
Here is a view through the scalar, it appears that things are lined up fairly close at this point. I used a different camera than previously, so I didn't have the luxury of being able to set a lens into the scalar ring.
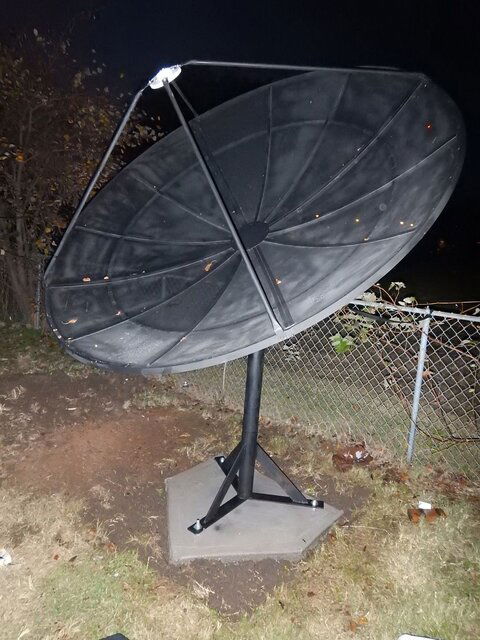
And here is a photo of the refurbished dish, with new scalar sitting on its' new concrete pad. Flash photo really brings out paint inconsistencies that aren't seen in daylight...
Yesterday: As the pad was cured sufficiently to drill for epoxied bolts; I drilled three holes into the concrete about 10-inches deep- through the pad into the piers. I cut three pieces of 3/4" grade 5 threaded rod (not all-thread). To secure the rod into the holes, I used USP connectors brand CIA-Gel 7000 concrete epoxy. It comes in a tube like silicon caulk, there is a mixer nozzle that attaches on the end which mixes the resin and hardener. After the holes were thoroughly cleaned and the threaded rod thoroughly cleaned; I injected the concrete epoxy into the hole and then inserted the threaded rod. Recommended bolt up time with the epoxy is supposed to be 4 to 8 hours, this set 24 hours before any stress.
Today, I painted the post and legs and let the paint set for a little bit. I thoroughly coated the anchor bolt threads with anti-seize, installed the lower set of nuts and washers and then set the post onto the anchors, placed washers and snugged the upper nuts. By the weekend, the epoxy should have cured to full strength and the concrete should be very near full working strength. As I didn't take photos of the epoxy job, I will have to say it is a bit more time consuming and messier (e.g., blowing concrete dust out of holes) compared to setting anchor bolts in concrete. However messy it was, I was pleased when my mount set down perfectly on the anchors.
At this point, I thought I'd see if I was anywhere near plumb and to my surprise, it was nearly spot on in both directions. The anchor bolts with a nut and washer above and below the mount will allow adjustment, so I should be able to fine tune plumb pretty quick.
I was in the process of trying to get the dirtwork cleaned up when I ran out of daylight. So I washed off the pad and snapped some photos.
Here is the concrete base with the dish mounted on the anchors:

While the paint was drying, I also test fit the scalar that was included with the Titanium C1PLL LNBF. To accommodate the three LNBF set screws, the arms seem to be mounted further outboard than with the previous scalar.
Here is a photo of the scalar, the silver is smudged anti-seize...

I think the scalar is fairly close to how it needs to be mounted, but would like some input. All legs of the scalar mount are pretty much equal distance around the scalar. Would the new scalar change things, like focal distance (or anything else), enough to worry about? As it is, I don't think the legs will mount any further inboard without interrupting the LNBF set screws.
Here is a view through the scalar, it appears that things are lined up fairly close at this point. I used a different camera than previously, so I didn't have the luxury of being able to set a lens into the scalar ring.

And here is a photo of the refurbished dish, with new scalar sitting on its' new concrete pad. Flash photo really brings out paint inconsistencies that aren't seen in daylight...

No photos right now...
However, the Echostar is now back in service.
So for today, I looked at plumb and moved the polar mount to what I thought was due south. I checked plumb on the pole and polar mount and snugged down the retainer bolts for both. I installed the C1PLL and hooked up the spare TV and my receiver out at the dish.
As the dish was being held in place by bailing wire at this point, I moved the dish to what I thought was 99W and scanned just to see. I picked up 5 channels. After a bit more tweaking and entering in some transponders and rescanning I got a whole lot more. So I fiddled with (i.e., just watched) 99W for a bit.
I then installed the motorized actuator and and messed with it a little more using an 18V Milwaukee battery pack. The whole time the motor worked quietly and quite well (except for the when I wasn't paying attention and the + wire shorted to the - wire and burned my fingers).
I decided I should work on my due south satellite, so I moved the dish to the approximate location of 97W and scanned in quite a bit. I worked on peaking the dish on the weakest FTA transponder I received at 97W... As it was getting late and we had a baseball event to watch, I returned to the original spot and hooked up the RG-6 and put the receiver back in the house. The picture absolutely blows away what I can get on OTA (BTW, at this point we can only unreliably get three OTA channels 1 CBS and 2 Fox; hence my foray into FTA satellite TV).
While messing with the setup, I showed my wife some of the programming I was receiving with just the two satellites and she was much happier with with 97W on C-band versus Ku-band... In other words, she's ready for me to get this dish fully motorized. So I guess I'm looking at a little more equipment for C and Ku band...
As the dish setup had come from approximately 10 miles from my location, I haven't done any adjustments to the polar mount or the declination of the dish. I think I need to tweak some more at the top of the ark, but for now it's up and working...
I'll post some more photos later.
So here are a couple of photos of the operational Echostar. I didn't do anything to the dish today...
So here are some photos of the installed and working Echostar with the Titanium LNBF and scalar. Somewhere here I read about installing the Titanium C1PLL with the heat sink in the vertical position, which is angled at about 45 degrees from the top of the arc. I also had read about installing the silver coated (painted?) screws) that were included with the LNBF.
The quality on the receiver has been fairly stable across the transponders. Looking at the photo below, it looks like the LNBF is a bit off kilter. Whenever I get to more fine tuning, I'll address that issue. Additionally, things will get buttoned up whenever I decide upon which dish mover to use (suggestions are appreciated). I didn't replace the LNB housing; I'm thinking I should just leave it off.
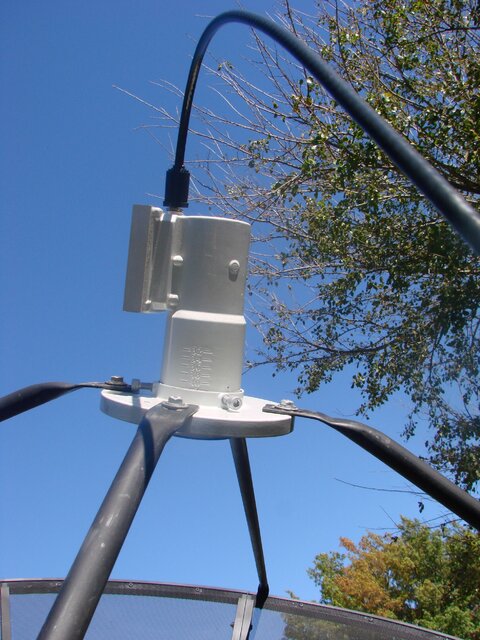
There is still enough adjustment left to do, however we've just been enjoying the programming today.
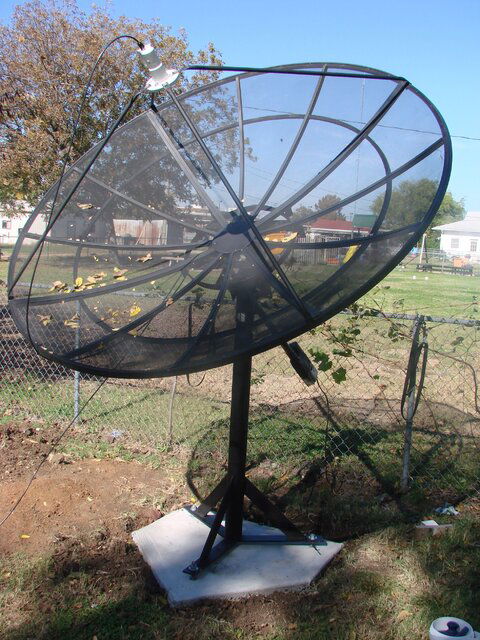
So here are some photos of the installed and working Echostar with the Titanium LNBF and scalar. Somewhere here I read about installing the Titanium C1PLL with the heat sink in the vertical position, which is angled at about 45 degrees from the top of the arc. I also had read about installing the silver coated (painted?) screws) that were included with the LNBF.
The quality on the receiver has been fairly stable across the transponders. Looking at the photo below, it looks like the LNBF is a bit off kilter. Whenever I get to more fine tuning, I'll address that issue. Additionally, things will get buttoned up whenever I decide upon which dish mover to use (suggestions are appreciated). I didn't replace the LNB housing; I'm thinking I should just leave it off.

There is still enough adjustment left to do, however we've just been enjoying the programming today.

- Status
- Please reply by conversation.
Similar threads
- Replies
- 0
- Views
- 632
- Replies
- 14
- Views
- 859
- Replies
- 21
- Views
- 1K
- Replies
- 1
- Views
- 551
- Replies
- 0
- Views
- 569


