Phlat's Birdview #2

Status
Please reply by conversation.
Congratulations on being up and running. Since I got mine going, it is by far the most used dish in my arsenal.

Just a thought on reed sensors and counts, I got my reed sensor at Radio Shack and made a little mount for it that allowed me movement on all axes - Using nylon screws, nuts and a spacer ( I didn't want anything magnetic near the sensor) . I took the one inch long nylon spacer, and drilled a hole in it lengthwise one drill size smaller than the reed diameter. I cut the spacer lengthwise, off center so when I took the bigger half , the reed sensor kind of snapped in sideways. I took a 2 inch long by 1/8 inch nylon screw and drilled the spacer so it looks like a "T" with the vertical line of the T representing the nylon screw. You do have to make it so the head of the screw doesn't protrude into where you pop in the reed sensor. I had a short section of aluminum angle material, which I mounted on the outer bolts holding the worm gear. After a little cutting and bending , I drilled a hole in the end tab o the angle and mounted the nylon thingie in it.

So, all popped in and wired up, I was able to twist the reed sensor everywhich way and move it closer and further away from the magnet wheel . After about four tries, I liked it, so I used the little nylon nuts to lock the position and alignment of the reed sensor in place. As to how the sensor was oriented in the spacer, I put a few drops of Krazy glue in there to hold it in place.

My setup is a bit different in that my magnet wheel is a bigger diameter , requiring me to put a spacer in between the plastic cover and the HH Mount. But that does mean my 24 magnets are spaced a bit further apart than yours.

My mount goes fast and rarely misses a count. The only time I've had trouble with it has been when the connectors at the Gbox iodized. easy to fix.

I actually should get a camera and some pictures of it before the weather turns bad.
 
Thanks Lone Cloud, I've still got a long way to go but at least the heavy mechanical stuff is mostly done.

IIRC you used a cutout from the end of a 4" PVC pipe cap to make your magnet wheel? I looked for one of those, but every one I could find had a domed end on it, instead of a flat end.

Please take some pics of your setup and post them on the forum, lots of current and future BV fans would really like to see them. :)
 
we don't need no stinking elm's.....

You got that right gremlin, that sucker is outta here!

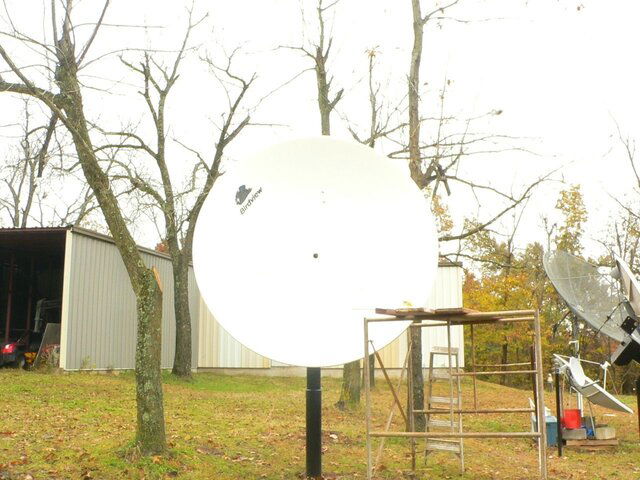
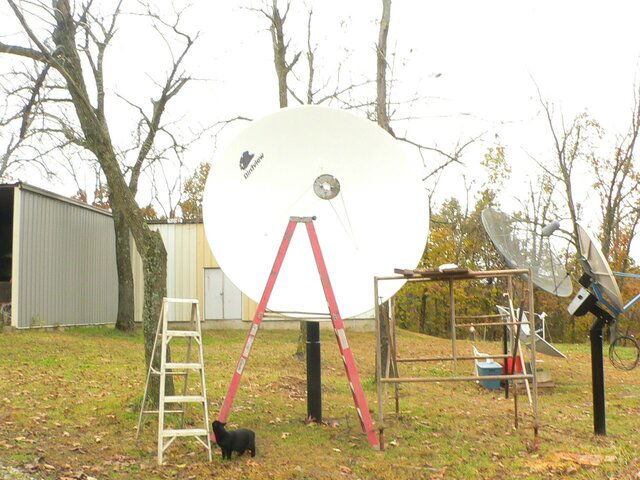
I removed the feed supports and scalar to paint the dish, used some $12/gal commercial exterior latex, applied with a 1/2" nap roller. Did a little restoration work with a black permanent marker to bring out the "Birdview" logo letters.

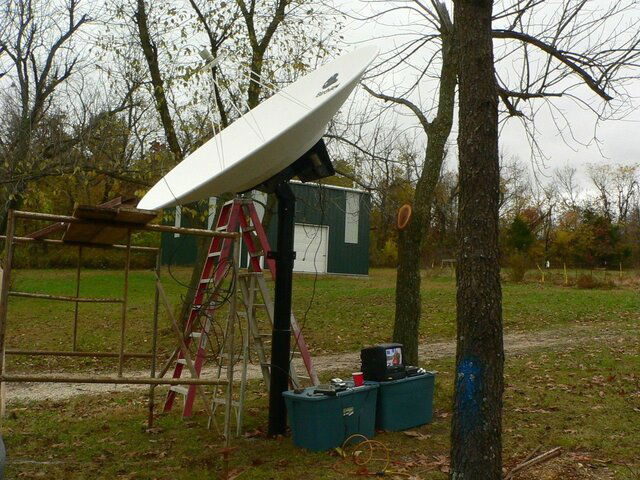
Reinstalled the support arms and scalar and added a GeoSat Pro C2 dual C-band LNBF (and thanks to Brian @ SatAv for the great deal he offered to us SatGuys on these). Set the "0" mark vertically with the dish @ apex.

IF the sun ever reappears I will have some close-ups of the feedarm extensions and my declination adjusters, but for now will say that I have a face-of-dish center to face-of-scalar dimension of 40 3/8", and have about 1/4" of adjustment left if I wanted to move the scalar further away from the dish.

My pre-modded factory measurement was 39 3/8".

Set my "f/d" to "about 1/4" of the feedhorn sticking out of the scalar"....I think that corresponds to approximately .40 on the LNBF scale. I never touched the focal distance or skew after the initial settings. I do intend to check my LNBF pointing with a laser.....one of these days.

Set my main elevation bar to 37.7 (37.63 is what is in the "modified" charts for my location).

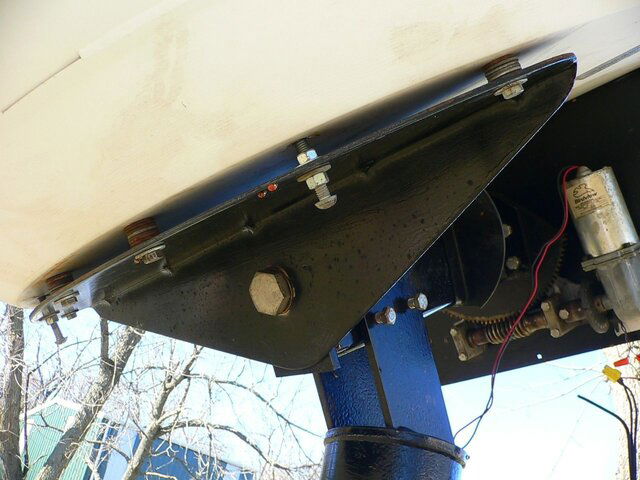
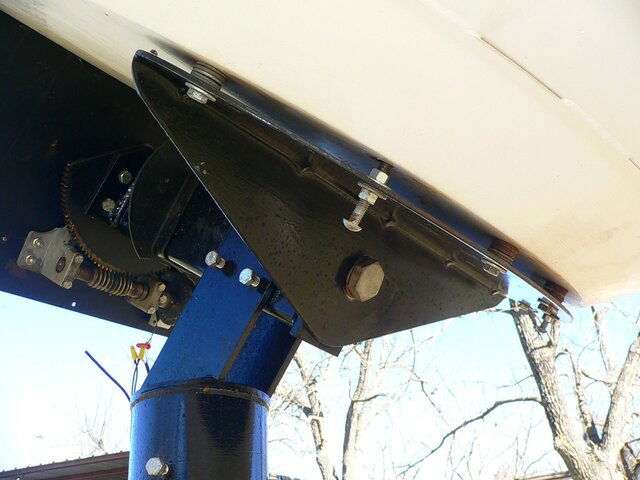
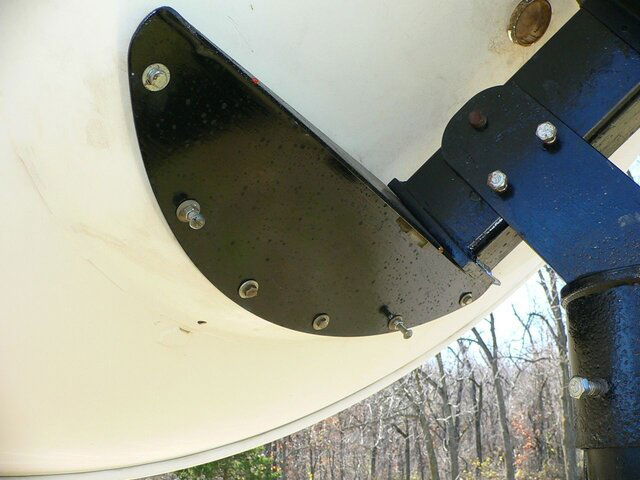
The BV mount has some declination built into it from the factory, mine had almost exactly 6 degrees and I need about 5.3 degrees for my location. This requires spacing the dish forward from the bottom mount plate.

I achieved this originally with a small steel splitting wedge and all 6 bolts snugged-up in the dish, thought I would need to play with this adjustment (and the wedge would make this quick and easy) but the way it turned out my digital angle finder was right on the money, so further adjustment wasn't necessary.

After leveling the BV mounting cap on the pole (which required a slight corresponding elevation adjustment).....and a minor azimuth adjustment, I was receiving the LPTV mux on 95W at 95% Q (w/Visionsat IV-200). 93W is actually my true south but there is no C-band there, AFAIK.

I then removed the steel wedge and installed 2 bolts with 1 nut and flat washer on each side of the mounting plate (in the holes that next to the "outside" holes , these could also be used to quickly and easily adjust the declination. In the other 4 holes I used stacked flat washers which I stuck in and aligned them for the bolts with a tapered punch (had no masking tape, Stogie! :D ), and snugged it all up.

Then I started working my way to the west, one sat at a time (peaking and noting the position numbers on my V-Box 6), made one more tiny azimuth adjustment, and in a couple hours was viewing the NASA mux on 137W, and then got that DG TX Prog tp on 139W.

Went back to 95W and started working my way to the east, never touched the az/el/dec again, and eventually made my way to 43W, on which I was getting very acceptable signal, especially considering I was looking through several leafless trees.

I then set my software limits and saved all my count numbers as Position numbers in the V-Box, and it has worked flawlessly from 43W-139W. It doesn't double the counts (like the G-Box) but I am getting 855 (24-magnet wheel) counts in the arc from 43W-139W, so should have about 1700 counts when I get my G-Box fixed.

Now I need to install my new underground runs, more pics to follow. I'm very impressed with these Birdview dishes/mounts.....anybody know where I can find a 10 footer? ;)
 

Attachments

  • Sat BV2 New Paint.JPG
    Sat BV2 New Paint.JPG
    185.8 KB · Views: 205
  • Sat BV2 C2 First Signal3.JPG
    Sat BV2 C2 First Signal3.JPG
    207.1 KB · Views: 208
  • Sat BV2 C2 First Signal.JPG
    Sat BV2 C2 First Signal.JPG
    301.8 KB · Views: 203
The Birdview Declination Adjuster (BVDA), (patent non-pending). ;)
 

Attachments

  • Sat BV2 Declination Adjuster.JPG
    Sat BV2 Declination Adjuster.JPG
    159.5 KB · Views: 211
  • Sat BV2 Declination Adjuster2.JPG
    Sat BV2 Declination Adjuster2.JPG
    139 KB · Views: 219
  • Sat BV2 Declination Adjuster3.JPG
    Sat BV2 Declination Adjuster3.JPG
    143.1 KB · Views: 214
Good work Phlat, you are right up there! Funny picture of the cat studying the ladder. I used to have one that would climb the extension ladder, if I left it up, and be walking around on the roof of the house, lol.
 
Good work Phlat, you are right up there! Funny picture of the cat studying the ladder. I used to have one that would climb the extension ladder, if I left it up, and be walking around on the roof of the house, lol.

We actually have an old step ladder leaning against the house, just for that cat to get up to the deck that is outside our bedroom window (where she comes to be let in).

She used to be able to climb the cedar siding but she's getting old, needs a ladder now! :D

Here is a couple more magnet wheel templates, they are both for 1/8" diameter magnets, one is for 32 and one is for 40 magnets.
 

Attachments

Status
Please reply by conversation.

Users Who Are Viewing This Thread (Total: 0, Members: 0, Guests: 0)

Who Read This Thread (Total Members: 2)

Top