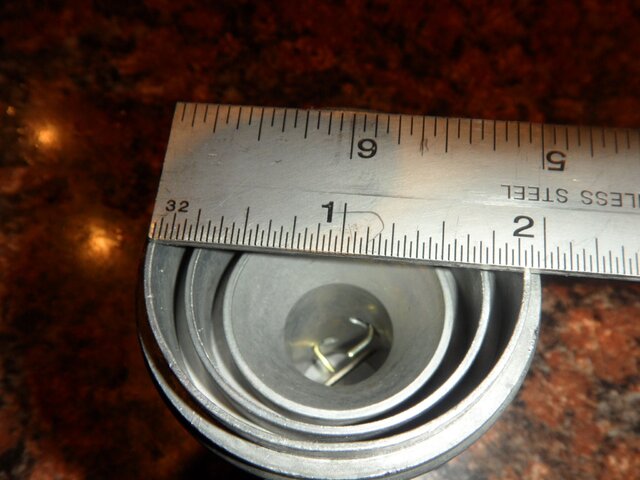
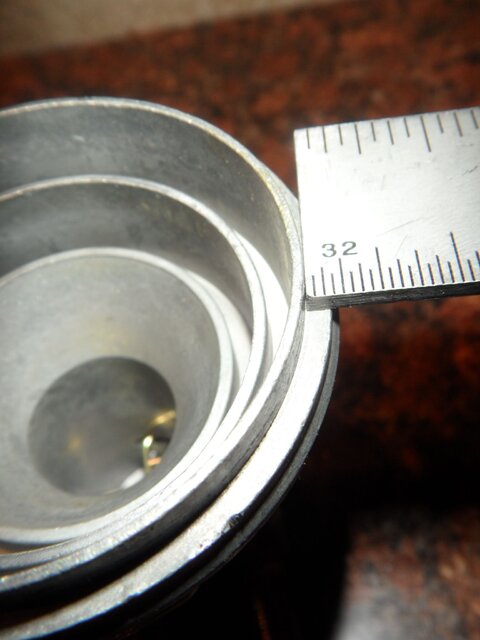
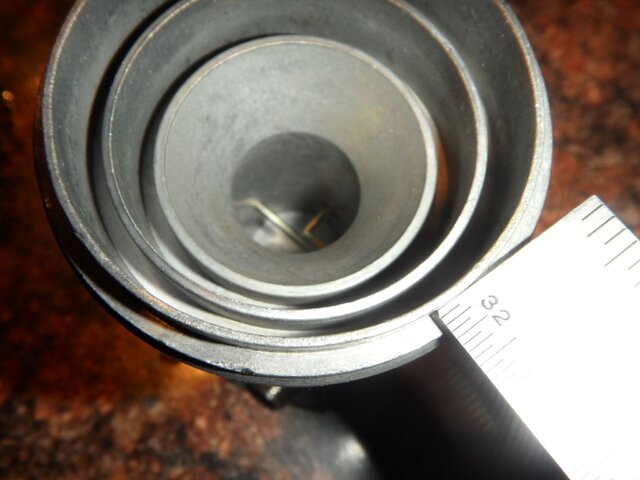
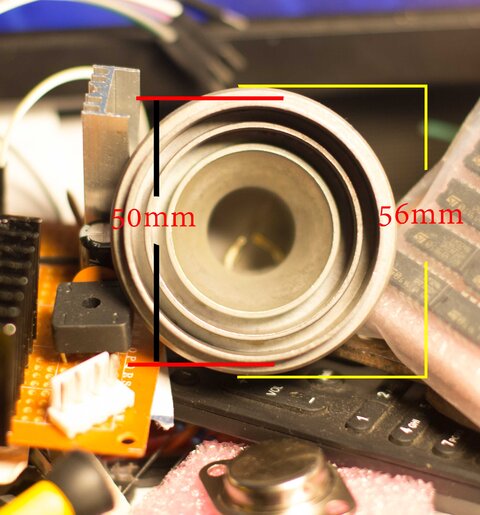
60 mm, so the PLL-SL1 is actually a bit smaller than the Amiko, almost exactly the same size. Lone Gunman's C/Ku LNBF must be a little different than mine. Thanks, Ke4est.
DMX741 C/KU LNB mod to fix drifting Ku
- Thread starter . Raine
- Start date
- Latest activity Latest activity:
- Replies 68
- Views 11K
You are using an out of date browser. It may not display this or other websites correctly.
You should upgrade or use an alternative browser.
You should upgrade or use an alternative browser.
- Status
- Please reply by conversation.
I don't think he means those connectors, but the one sticking up vertically on the C section. In this picture you can see how close it is to the Ku LNB:
Yup, those are the ones I'm talking about. They are on the C section of that DMX741 and it's two of them sticking out of there on mine because it has the 22Hz switch built in. In fact yours looks like it's off center just a bit for the same reason.
Hey Michael, do you know what the diameter of the end of that Ti one is without the plastic piece on it?
And did you have to break the plastic off the rear part or will it come off in a way that it can be put back on?
Mine is a little different then, I only have one F connector sticking up out of the C section, no built in switch.
Mine could be off center a bit. I didn't measure it, just put it on where it looked centered. I haven't had the time to mess with it lately, hoping to get to it this weekend and make the permanent mount for it plus tweak it all up.
Not off hand, but if I get around time later I will take one apart and see.Hey Michael, do you know what the diameter of the end of that Ti one is without the plastic piece on it?
And did you have to break the plastic off the rear part or will it come off in a way that it can be put back on?
If you are very careful you can get it apart and put it back together easy.
...but you can also easily tape it or glue it back together if push comes to shove and you break the little tabs.
The scalars are significantly different between the KU LNBFs. Compare the ring depth, spacing and shape. The original is a flat scalar likely specifically tuned for the feedhorn to cancel the phasing issues caused by the KU frequencies bouncing around in a C-band cavity. The replacement LNBF is a conical shape (for the typical .6 FD offset reflector). Designed to choke much different angles and phasing. Very likely that the replacement will have much different performance across the frequency range (for good or bad). 
If you are into tinkering to maximize performance, consider grafting the original KU scalar onto the new KU LNBF. Most LNBFs have similar throat diameters. A hacksaw, JBWeld and a few wraps of duct tape for good luck...
If you are into tinkering to maximize performance, consider grafting the original KU scalar onto the new KU LNBF. Most LNBFs have similar throat diameters. A hacksaw, JBWeld and a few wraps of duct tape for good luck...
I have way more junk on my workbench, but you are a close second!
I cropped this picture in Photoshop....I tried to hide most of it.I have way more junk on my workbench, but you are a close second!
Thanks for the photos guys. This will probably be a future project as I'm loaded up right now. Makes me wonder how I ever got anything done when I worked full time??
I decided to try a little of the C/Ku LNBF building myself today. I used a pair of PLL LNBFs. Might as well make it good right? Not real complicated I hope. Just saw off the Ku scalar. Cut a hole in the back of the C-Band LNBF. Line it up and glue in place, I hemmed the skirt and put the dress back on the Ku LNBF too.
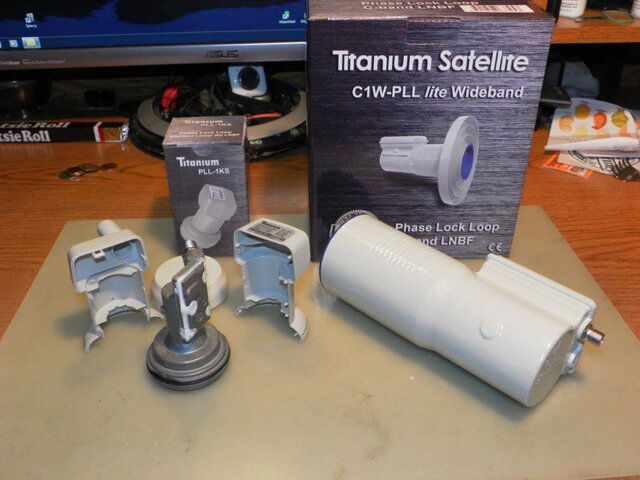
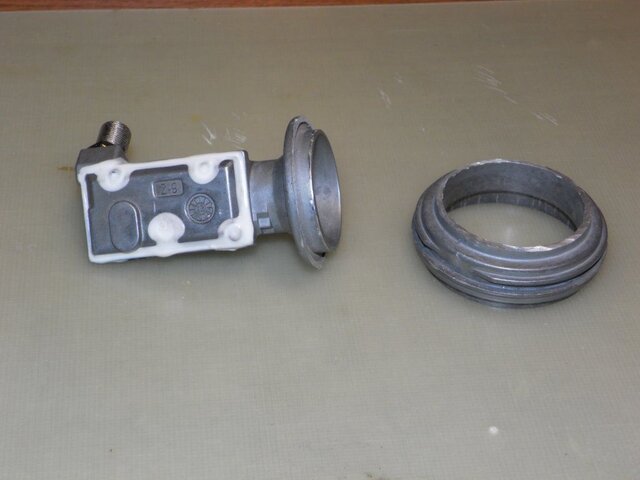

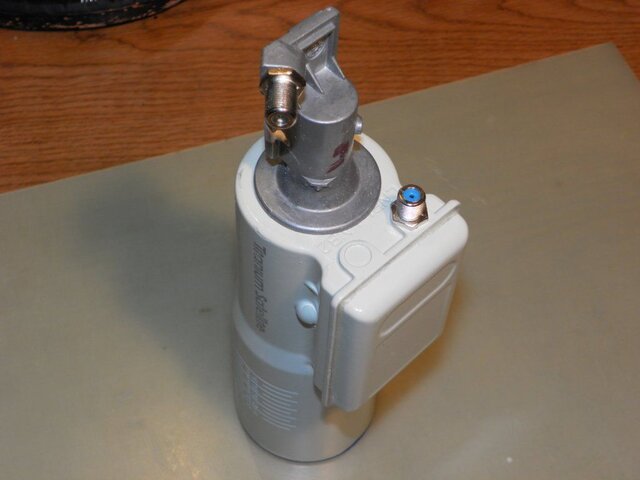
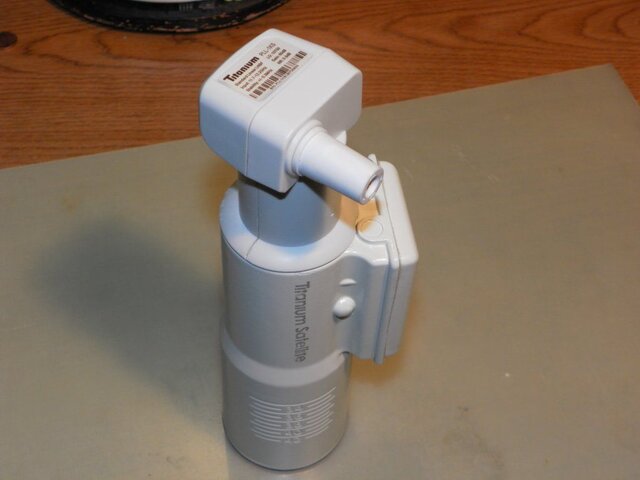


I decided to try a little of the C/Ku LNBF building myself today. I used a pair of PLL LNBFs. Might as well make it good right? Not real complicated I hope. Just saw off the Ku scalar. Cut a hole in the back of the C-Band LNBF. Line it up and glue in place, I hemmed the skirt and put the dress back on the Ku LNBF too.
View attachment 109454 View attachment 109455 View attachment 109456 View attachment 109457 View attachment 109458 View attachment 109459
If it works as good as it looks you'll be in "high cotton"!
But how about the F/D for that Ku part, or is that important? That is essentially the same thing that Robby did with the NS741.
I'm real interested in seeing how this works.
Ditto.... Keep us updated.But how about the F/D for that Ku part, or is that important? That is essentially the same thing that Robby did with the NS741.
I'm real interested in seeing how this works.

I decided to try a little of the C/Ku LNBF building myself today. I used a pair of PLL LNBFs. Might as well make it good right? Not real complicated I hope. Just saw off the Ku scalar. Cut a hole in the back of the C-Band LNBF. Line it up and glue in place, I hemmed the skirt and put the dress back on the Ku LNBF too.
That looks really good, I hope it works good! The C/Ku LNBF that I was working with started drifting on the C side the same as the Ku original had, so that project came to a halt for me. I was debating about cutting a hole into one of my C1PLLs just like you did. I wasn't sure if it would work well with that bar going across the inside of the C1PLL.
Let us know how it works once you try it, it looks great!
A few unknowns for me in this little project as well. I may get a chance to test it Sunday. I need to round up my meter I have loaned out. Tomorrow is the game!
Do you know what that rod inside the C1WPLL is for? I'd debated knocking it out and filling in the two holes on either side, but I didn't know if it's there just to support the throat of the LNBF to keep it from becoming deformed from over tightening or such, or if there's some other reason for it being there. None of my other LNBFs have any like that in them.
I'm not sure what the rod is for either. It's location suggests to me it is for cross polarity isolation. But that is a guessDo you know what that rod inside the C1WPLL is for? I'd debated knocking it out and filling in the two holes on either side, but I didn't know if it's there just to support the throat of the LNBF to keep it from becoming deformed from over tightening or such, or if there's some other reason for it being there. None of my other LNBFs have any like that in them.
I'm not sure what the rod is for either. It's location suggests to me it is for cross polarity isolation. But that is a guess
That sounds sensible. We'll have to ask Brian next time one of us is talking to him, get it straight from the horse's mouth.

I'm not sure what the rod is for either. It's location suggests to me it is for cross polarity isolation. But that is a guess
I've got a couple of those DMX741s here and also an NS741 and all of them have a bar up next to the top Cband antenna. Only difference is that on the NS741 that bar doesn't go all the way across and only sticks out about 3/4"?? The Ku ends on'em also have that bar only it's smaller and it's 90* from the Cband one.
- Status
- Please reply by conversation.
Similar threads
- Replies
- 4
- Views
- 825
- Replies
- 7
- Views
- 316
- Replies
- 9
- Views
- 478
- Replies
- 8
- Views
- 821


