Cards on the table here: DISH equipment is pretty reliable. You hardly have to do anything to maintain it. That's a pretty impressive thing to say about a device as powerful as most computers that spends its entire life in a dusty, stuffy cabinet. But, occasionally, you do need to do a little maintenance. If you're changing equipment, it's usually detected automatically. Sometimes… it isn't. And so DISH has a little procedure they call "check switch" which will force the receiver to confirm that its setup is what it should be.
Generally you'll have to do this if you're going to a new location. Most people don't do this a lot but if you're in an RV, you may be doing it a lot. It's not hard to do at all, but you have to know how.
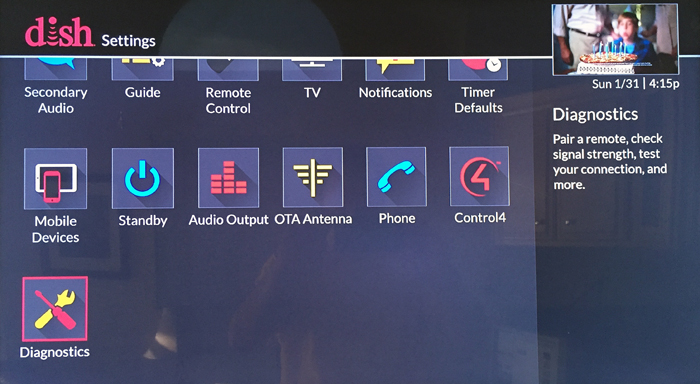
Press MENU on your remote. Then choose Settings. One of the settings is "Diagnostics."
Choose Dish.
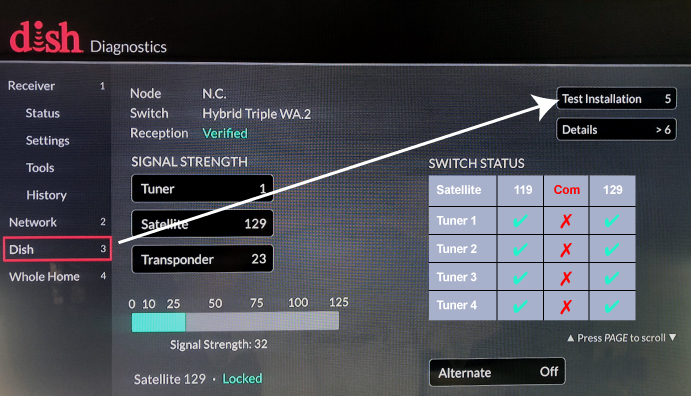
Select "Test Installation."
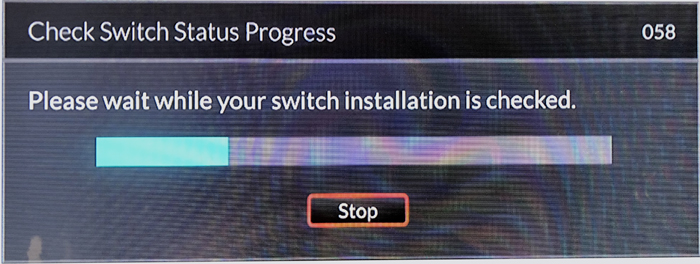
Then, all you should have to do is sit back and wait.
If you still have a device with the old user interface, the procedure is similar but slightly different.
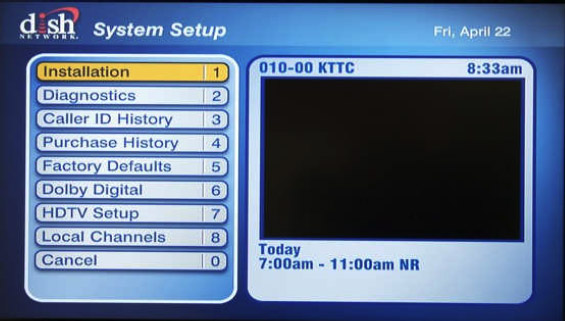
Press MENU then choose System Setup.
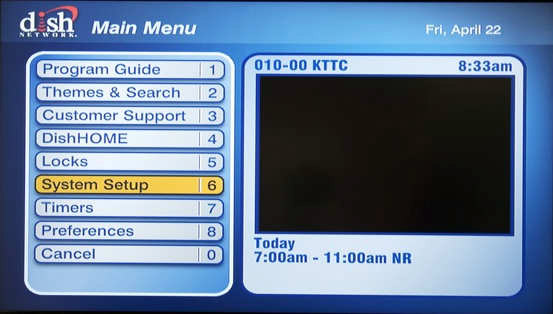
Then, choose Installation.
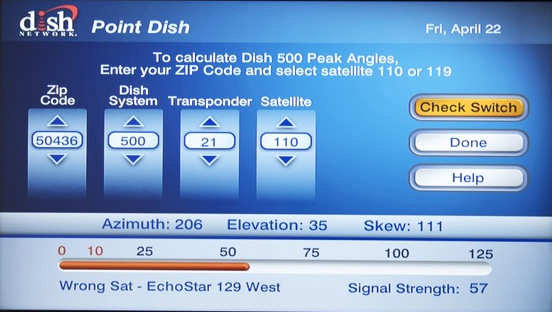
Then select "Check Switch."
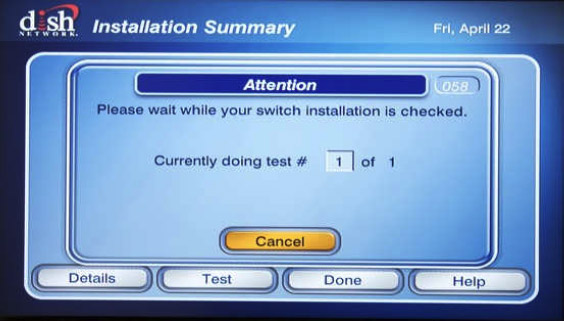
The check switch test will run without a lot of feedback. You'll just get a screen to watch while it's working.
Once you are done, press Done.
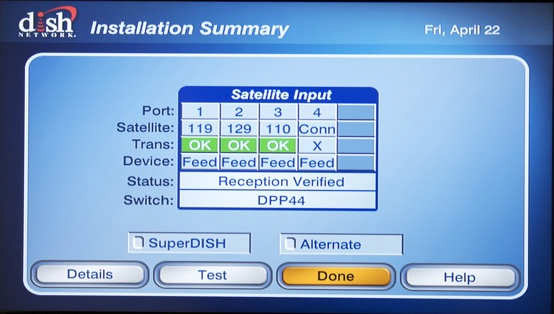
That should fix the problem in most cases.
If you're still having problems with your DISH installation, call the experts! Solid Signal does more RV satellite activations than anyone else in the world! We're your go-to source for technical support for DISH products. Call the experts at 888-233-7563 during East Coast business hours. We'll take great care of you. If you prefer chat, use the chat button at the lower right of this email. Or, just fill out the form below. We'll get back to you, usually within one business day.
The post NICE AND EASY: How to run a "check switch" on your DISH receiver appeared first on The Solid Signal Blog.
Continue reading...
Generally you'll have to do this if you're going to a new location. Most people don't do this a lot but if you're in an RV, you may be doing it a lot. It's not hard to do at all, but you have to know how.
Note: Screen captures are taken from other sources on the internet. No copyright infringement is intended. If you are the legitimate owner of one or more of the images below, use the "Contact the Editor" link at bottom. We will happily take down images by request. Unless we receive a request, we will assume that we have the fair right to reproduce these images.
That ought to shut our lawyers up. Let's proceed.
Newer receivers/Hopper DVRs
Press MENU on your remote. Then choose Settings. One of the settings is "Diagnostics."

Choose Dish.

Select "Test Installation."

Then, all you should have to do is sit back and wait.
Much older devices
If you still have a device with the old user interface, the procedure is similar but slightly different.
Press MENU then choose System Setup.

Then, choose Installation.

Then select "Check Switch."

The check switch test will run without a lot of feedback. You'll just get a screen to watch while it's working.

Once you are done, press Done.

That should fix the problem in most cases.
What to do if that doesn't fix things
If you're still having problems with your DISH installation, call the experts! Solid Signal does more RV satellite activations than anyone else in the world! We're your go-to source for technical support for DISH products. Call the experts at 888-233-7563 during East Coast business hours. We'll take great care of you. If you prefer chat, use the chat button at the lower right of this email. Or, just fill out the form below. We'll get back to you, usually within one business day.
The post NICE AND EASY: How to run a "check switch" on your DISH receiver appeared first on The Solid Signal Blog.
Continue reading...

